Okay, so you may have noticed that I’ve been cooking a lot with potatoes — which are, actually, my least favorite food of all time ever. There, I said it. A weight off my chest. BUT I had a five pound bag of russet potatoes that was starting to sprout, and I’m all about minimal food waste, so I’ve been trying to use them up.
To finish off my bag of potatoes, I decided to take a stab at gnocchi.
I’ve never made gnocchi before, or pasta, or anything of the sort. I’m a noob, so to speak. But I am also a sucker for a challenge. And so, to make this a bit more fun, I decided not to use a recipe.
That’s right. I went in blind.

Well, not entirely. I’m not completely insane, so I did at least look up the basic ingredients of gnocchi and I watched a YouTube video of a very Italian guy make a batch.
Much to no one’s surprise, my first attempt was not entirely successful. I wouldn’t go so far as to mark it a failure, but I will say that I have a few notes for next time.
Here’s what I used:
- 3 russet potatoes
- 1 egg
- 1.5-2 cups flour
- Salt and pepper
These proportions only got me approximately two servings of gnocchi, so keep that in mind should you choose to try this!
Some comments on those ingredients:
My potatoes were on the smaller side, seeing as they were the last three in the bag. I probably could have used at least one more for my batch. If I had three chunkier potatoes, I think the proportions would have been fine.
I did not measure how much flour I used. Between what I used to roll out the shapes, and what I incorporated into the actual dough, I’m guessing I used somewhere around 2 cups, but I really have no idea.
I definitely under-seasoned my gnocchi. I’m not really one for measurements, I find it much more fun to eyeball and approximate amounts. That being said, I definitely could have used more salt and pepper in my dough to enhance the flavor.
All of that said, here is how I made my gnocchi:
Step One: Boil Your Taters
Pretty straightforward — pop your taters in some boiling water and let them cook! The time will depend on how chunky your potatoes are, but you want to get them to a point where you can sick a fork in them with ease, and they’re cooked all the way through.
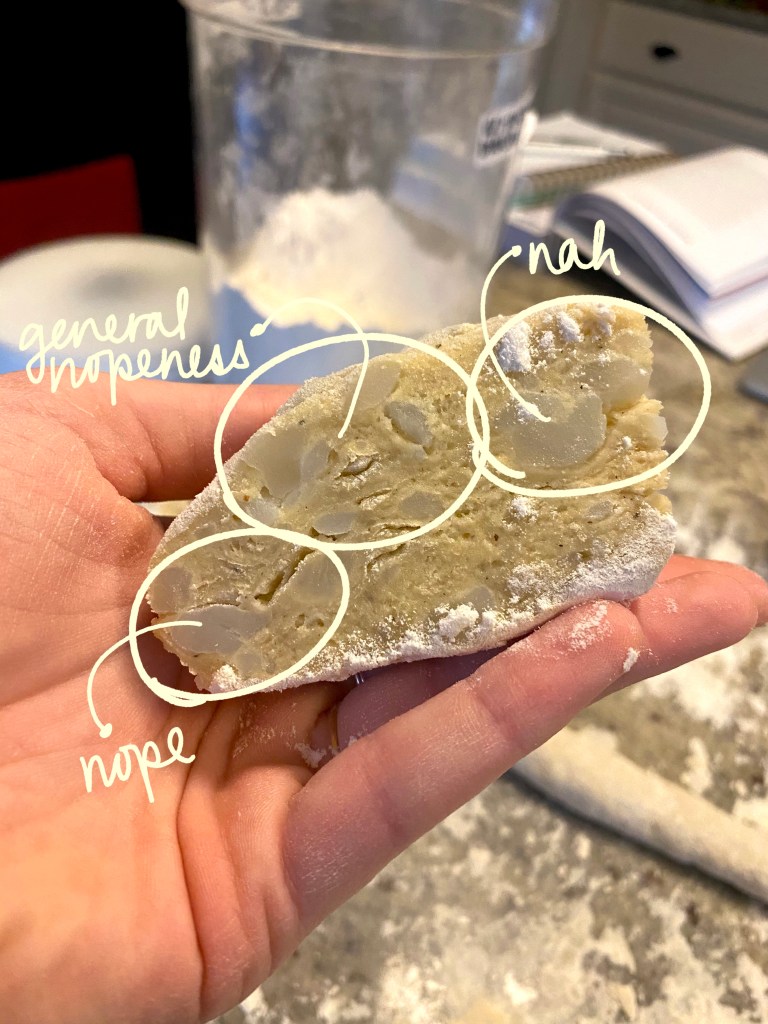
It’s super important to cook your taters completely. I didn’t let mine boil quite long enough this round because I’m an impatient fool.
In an effort for full transparency, here is what happens if your tater’s are not fully cooked when it comes time to form your dough — you get chunky splotchy gnocchi. Nobody wants that.
Step Two: Cool and Peel Your Taters
Once your potatoes are fully cooked, take them out of the water and let them cool until they easy to handle. As mentioned before, I’m an impatient bitch so I skipped this step and opted to burn my fingers instead.
If you care about maintaining your fingertips (weirdo) but are also an impatient bitch (let’s start a club), you can dunk your starchy babes into a bowl of ice water to quicken the cooling process. If you’re going to use that method, definitely make sure your potatoes are completely cooked because the ice bath will stop any further cooking entirely.
Step Three: Make Your Dough
Toss those tater skins (or throw on some cheddar and eat them, if you’re into that), and throw your potatoes into a bowl for mixing. Use a potato masher to squish your potatoes until there’s minimal lumps. Doesn’t have to be super smooth at this point, because you’re gonna keep mixing in a hot minute.
Once your potatoes are mushed, throw in your salt and pepper and mix again. You can use your hands at this point, if you’re a tactical cooker like myself. If you’re a wuss, you can use a spatula or a fork.
Once your salt and pepper is fully incorporated, make a little hole in the potatoes at the bottom of your bowl. Crack and egg, and plop it in the center. Give that egg a quick lil whisk with a fork, and start incorporating it into your taters. Again, I prefer to use my hands, but if you’re squeamish about touching raw egg, go ahead and use your spatula.
Your dough is gonna be kinda squishy and super sticky at this point.
Step Four: Add Flour
Flour your workspace and put your dough down on top of it. Throw about a quarter cup of flour on top of your dough, and start incorporating it. Mix with your hands until your dough starts to become less sticky and takes an easily malleable shape. Continue to add flour until you can easily form your dough into a ball.
Step Five: Cut your Dough
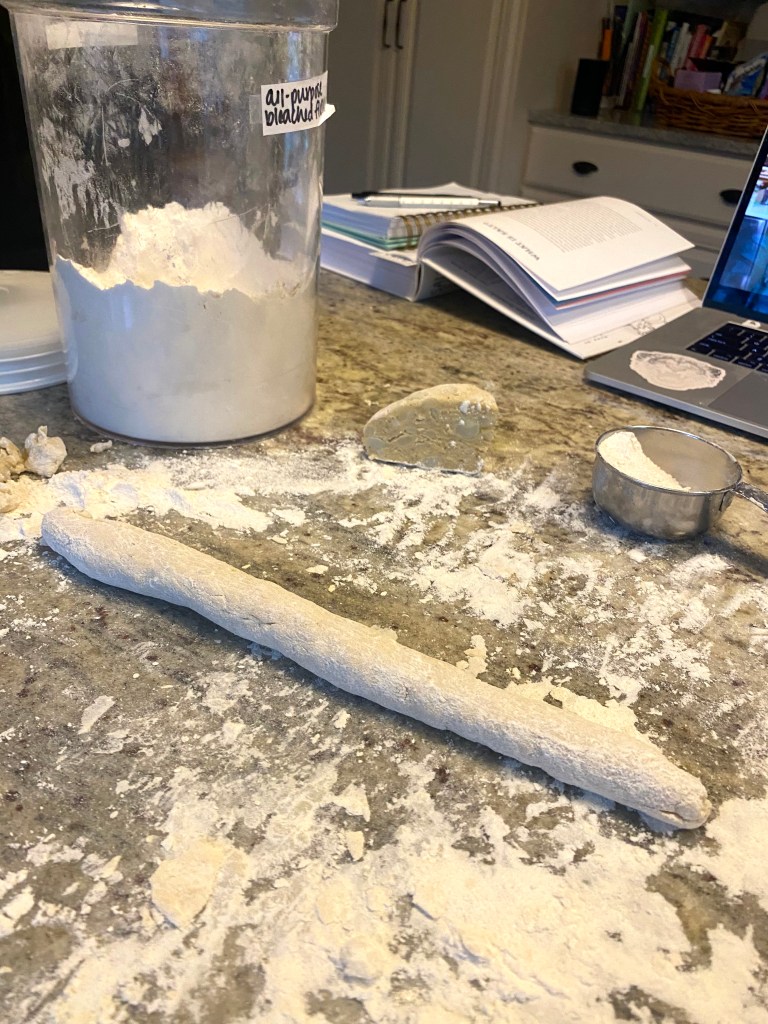
Roll your dough into one big ball, and cut it into quarters. This makes it more manageable to roll out. Take one quarter at a time and roll them snake style, just like you did in preschool with play dough. Then, slice that snake into pieces approximately 1/2 inch thick.
Step Five: Roll Your Gnocchi
Grab a fork, and flip it upside down, so the curve faces away from your work surface. Take your 1/2 dough pieces one-by-one, and roll them across the back of your fork to create that linear pattern on your gnocchi.
There are probably other, perhaps better, ways to shape gnocchi, but this is the one I used.
Step Six: Cook Your Gnocchi
Boil a pot of salted water and toss in your gnocchi. Your gnocchi is done when it starts to float, so keep an eye on it. Mine only took a few minutes to cook, if that.
Some of your little children may get stuck to the bottom of the pan, so you might want to give them a gentle little stir to encourage them to break free from their comfort zones, like any good parent.
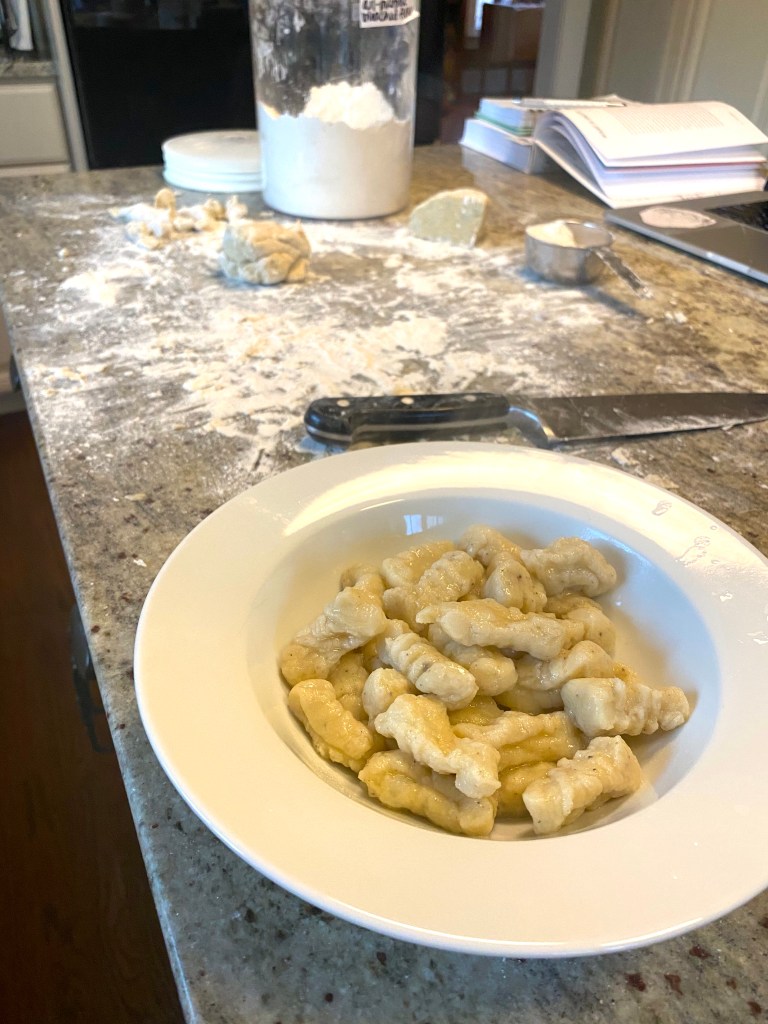
And that’s it! Seriously, this came together much quicker than I thought it would, but still made me feel all fancy-shmancy and accomplished.
I tossed my gnocchi in some garlic tomato sauce, basil leaves, and parmesan, but you can put whatever pasta sauce you want on this — pesto, vodka, alfredo, bolognese, you name it.
I’ll definitely be making this again and playing with the proportions until I get a recipe I’m happy with. Until then, learn from my mistakes and enjoy!
